11 Course Creation Tools We Can’t Live Without

In this post we share several of our go-to course creation tools that we rely on day in and day out.
When I was a kid, my grandfather had a massive workbench in his garage that stretched the length of one side of the structure. Above that workbench the entire wall was peg board, with hundreds of tools neatly organized by type and size.
Wherever he went I was always tagging along, especially if it involved a tractor or power tools. When he had a project on his to-do list, I remember him standing quietly in front of that peg board, just staring at it before finally grabbing a 5-gallon bucket and placing his carefully selected tool choices in it.
He said something to me that stuck with me to this day and it’s a phrase I find myself using around my own children…
“Don’t start the job without the right tools.”
We very often receive questions from our WP Courseware users looking for recommendations on various software, hardware, or services to assist them in creating high-quality course content as efficiently as possible. While we all know the advantages of e-learning, creating effective e-learning content can be a challenge.
And having created our first online course seven years ago, producing dozens of tutorial videos for Fly Plugins, and receiving feedback from thousands of WP Courseware customers over the years, Ben and I have narrowed our list of “must-have” course creation tools down to a handful of powerful essentials.
For anyone just setting out on the path to creating their first course or for those of you looking to improve the quality of your course content or produce content more efficiently, we thought we’d put together a comprehensive list of our “go to” course creation tools.
(*Note: We have intentionally left affiliate links out of this article for any services we have an affiliate relationship with. While we wouldn’t recommend these tools if we didn’t use them ourselves, we felt it was important for you to explore both these recommendations and other similar services without any commercial influence from us in order to create content that works best for your students.)

1. Screenflow - video, audio, and screen recording + editing ($99)
The tools in this list are in no particular order, but if we had to rank them I think Screenflow would take the top spot. Screenflow, which is currently only available for Mac machines, allows you to easily capture video and audio from any source including your computer screen and computer system audio.
In addition, Screenflow has a powerful set of editing features which allow you to easily move video or audio content around within your draft, cut/splice content segments, manage audio settings, and add video callouts such as zoom-ins, blurring content, highlighting features, text, fades, wipes, etc. In fact, the editing features are so easy to use that we very often use it solely for editing, importing video or audio from other sources and producing the final cut in Screenflow.
Other considerations:
*Camtasia for PC ($200)
*SnagIt ($50)
*WeVideo ($5 to $8/month)
*ClipChamp Web-Based Video Editor (Free to $39/month)

Screenflow combines powerful features with an easy to use interface.
2. Keynote/PowerPoint - course “whiteboards” and branded video backgrounds ($20/$110)
The first course that Ben and I created covered several topics in online marketing. The majority of the video content consisted of screen recordings of us walking through the use of various software packages or online services. But even then, we placed these screen recordings on top of branded Keynote presentation slides and then recorded them a second time as they were playing over the slides.
Most of you are already going to be familiar with PowerPoint for Windows machines or Keynote for Mac, and after Screenflow we use Keynote more than any other application for creating training videos. It’s a great tool for not only adding a branded background to your videos, but it’s also handy for creating a “blank canvas” on your computer screen when you just need to present text with a voiceover such as you would do with a lesson introduction or key topics overview.

Presentation slides are great to use as backgrounds for your videos.
3. GraphicRiver - premium presentation slides ($12-$25)
As mentioned above, you’ve probably already been using PowerPoint or Keynote for years. But guess what? So have millions of other users around the world. If you want to spice up your screencasts without using the same templates that we’ve all seen before, there are a lot of sites which offer pre-made premium presentation slides to give your videos a unique look. They can also save you a ton of time since creating your own custom slides can be a real time sink. Trust me…it’s money well spent.
For two years or so, I actually used a Mac app called Quartet for Keynote. It’s a great tool which offers premium presentation templates and even motion graphics and animations. However, since the developers of the app have to keep rolling out updates to provide any fresh designs, we have since started using a graphics marketplace called GraphicRiver (part of the Envato family which we’ll be discussing further).
GraphicRiver allows graphic designers to develop their own unique creations and then sell those through a marketplace. Prices for premium presentation slide packages generally range from $12 to $25 and your download will include several different sizes and formats.

GraphicRiver offers creative slide templates at affordable prices.
4. RenderForest - logo reveal intro videos (free to create, but $10 and up for premium downloads)
Logo reveal videos are typically a short animated video (around 10 seconds) which ends with your company or course logo. There are hundreds of different animations to choose from, and while a logo reveal intro isn’t completely necessary for your training videos it’s a very professional (and cool) touch to add…especially since they’re usually only around $10.
There are a number of logo reveal intro makers out there, but we really like RenderForest. Users can choose from 105 pre-made animations, so there’s a template to fit almost anyone’s course content and audience.
Here's a quick sample video we created using the Fly Plugins logo. The watermark can be removed by purchasing a high resolution version.
5. AudioJungle - stock music, jingles, background music ($15-$19)
Let’s face it…to keep your course content interesting you need variety in your presentations. And as much as I’m sure your students will enjoy listening to the soothing sounds of your voice, sometimes you just need to mix it up!
For the last several years we’ve been using AudioJungle as our go to marketplace for stock music to use in intros, animations, sales videos, and many other uses. The pricing is per song and generally ranges from $15-$19 for the most popular offerings. You can also browse by category, which can be really fun. The categories are pretty self explanatory, with titles like “Ambient”, “Cinematic”, or “Corporate”.
The best part is that once you purchase a title, you can import the song to your video editing software and use it in pieces based on how many seconds your use requires. This allows you to recycle different segments of the same title and get more milage out of your one-time purchase.
Here's a little jingle that we purchased last year to add to our tutorial videos:
6. Canva - graphic design for dummies (free, with premium upgrades)
Ah…Canva. Where shall I begin? 😉
Canva is a free web-based graphic design platform which comes with dozens of pre-built designs and stock images. The categories include templates for just about any project you can think of, including blogging, marketing, documents, advertisements, and even presentations. The majority of the templates and stock images are free to use, but Canva does charge a small fee (usually around $1) for the use of premium content. You can also upload your own images, backgrounds, logos, or anything else.
I recently wrote an entire post on using Canva for your online courses if you’d like to read it, but in that article I explored several different ideas for course content that can be created with it. This included things like course unit headers, infographics, lesson action guides, and several others.
If any of you have relied heavily on powerful graphic editing software such as Photoshop, you’ll know that these platforms can bury your computer’s memory and prevent you from doing anything else while they are open. Canva has likely eliminated around 75% of my Photoshop use and on the days when I need to create multiple images I am now much more efficient just through using a web-based graphic design solution.

Canva allows you to start with a template or create a design from scratch.
7. Proper microphone setup - voice recording and voiceover work (price varies)
Around two years ago I stumbled across a research study which interviewed several thousand students of online courses and one of the statistics in the results was startling. I won’t bog you down with the numbers, but in a nutshell it stated that students who are sitting through an online course have a much higher tolerance for poor quality visuals within a video than their tolerance for poor audio. In fact, in some of the courses used for the study the end of course surveys included direct feedback from students that they felt that their learning and retention was hampered by the lack of quality in the audio of the presentations.
Investing in a quality sound setup for your online courses doesn’t need to cost a ton of money, but it will go a long way in keeping your students happy, helping them reach their goals, and developing a strong reputation for your course(s).
I’m hesitant to share concrete recommendations when it comes to an audio setup for your course as the technology can vary greatly in price and we’re not all on the same budget. I’ll share my setup with you as well as a couple of more budget-friendly alternatives.
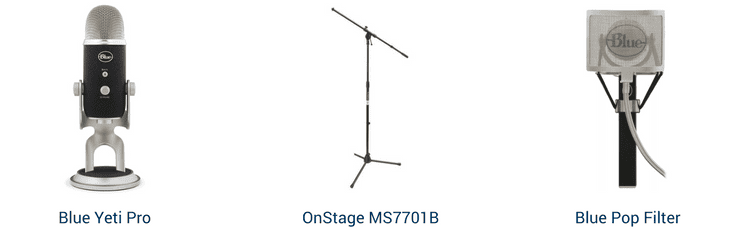
I’ve owned this mic for around four years and have recorded hundreds of hours of audio with it. And when my family and I traveled the world for a year while I was working remotely, it was thrown in and out of travel cases dozens of times. It’s a beast and while it’s not the cheapest microphone on the market at $249, it has amazing quality and durability for a USB mic. Blue also has great microphones at lower price points as well, such as the Snowball and the Nessie.
Other considerations:
*Blue Nessie ($90)
*Blue Snowball ($50)
*Audio Technica ATR-2100 ($75)
Microphone stand
When you’re trying to improve the quality of your audio, there are dozens of things you *could* do…foam panels, suspended mics, you name it. But if you decide to take your course audio seriously, after purchasing a quality USB microphone I would just ask you to please, please, please invest in a mic stand and a pop filter.
Most USB microphones will come with a desk stand, allowing you to place the mic on your desk directly in front of you. You may record an hour of video and barely even notice the sound of your laptop’s fan turning on or those gentle strokes on your keyboard or clicks of your mouse.
You know what? Upon playback those are going to sound like a t-rex was stomping around in your kitchen while you were in your office. Do yourself a favor and spend $25 on a decent stand like the On Stage MS7701B tripod boom stand that I use and get rid of the sound transfer from your desk to the microphone.
Pop filter
Once you have a microphone stand, it’s simple to add a pop filter. A pop filter reduces the mechanical impact of fast moving air during speech. If you don’t think it’s necessary, start a new audio recording, get right up in front of your mic, clearly speak “pop” at a moderate volume, and then play that recording back with headphones on turned up to max volume. Your students’ eardrums will thank you for the pop filter.
I currently use the pop filter from Blue Microphones, but you can find these for less than $10 on Amazon and they’ll clip right onto your mic stand.
8. Logitech C920 HD USB camera - video capture ($61 on Amazon)
Again, variety is crucial when students sit through hours and hours of video. One of the best ways to mix this up is by sprinkling in occasional videos of, well, you! Your students want to know who’s behind all of this content and I feel that it’s very helpful to say hi to them every now and then.
With cameras, it’s so easy to go overboard but you don’t need to! Webcam technology has advanced so much in the last few years that you can do as much with a $60 1080 HD camera as you can with a $3,000 DSLR. The Logitech C290 has been sitting on top of my monitor for a long time now and it’s perfectly capable of capturing your stunning good looks in high definition without breaking the bank. Not to mention, you can take it anywhere that you can take your laptop…just grab your computer and this little camera and you can record from anywhere that would be an interesting setting for your students to see you in.

The Logitech C920 offers incredible 1080HD recording for around $60.
9. MindMeister - mind mapping and course outlines ($5/month)
Now we move from media tools to course planning tools. And while they may not be as exciting to discuss as their media-related counterparts, we don’t want you to start the job of course creation without the right tools!
MindMeister is a free, web-based mind mapping tool which allows you to visually lay out your course content. If you’ve never used a mind map before, you basically start with a central topic (this would be your course), then add secondary nodes to represent major points, then tertiary nodes for finer points, etc. I also wrote an article a little while back on using mind mapping for course creation.
While it’s important to eventually get to a detailed structure for your course and a concrete outline to use when you begin creating lessons, I always recommend playing around in a mind map first. Because it’s a visual tool, as you add nodes your mind begins to explore the topic in a different way than an outline stimulates the brain. For me, this process of mind mapping ideas almost always leads me to think of important points that I would have left out if I had been working with a more traditional list-style outline.

MindMeister is a great high-level planning tool for course creation.
10. Evernote - idea capture, checklists, outlining (free)
A lot of you are probably already familiar with Evernote as well. It’s basically a note-taking app on steroids. You can use it for storing simple notes, creating checklists, or building outlines. While it would certainly be a great tool for producing drafts of your course outlines, I’m actually recommending that you use this free service for a separate requirement…idea capture.
Evernote allows you to create or update notes and notebooks which sync across all of your devices, including your mobile. This allows you to record random thoughts or snap photos of inspiring ideas no matter where you are and then incorporate those into your course planning later. And with Evernote’s web clipper browser extension, you can snag little tidbits from websites you come across as you’re doing other things and drop those into your notebook as well. I tend to be a “shower thinker”…good ideas usually hit me when I am nowhere near my desk or laptop. Evernote is a great tool for letting ideas for your course evolve wherever and whenever they come to you.

Evernote is handy for capturing ideas on the go.
11. Workflowy - lists and outlines (free)
Workflowy is billed as a “notebook for lists”. As such, it’s a great tool for finally taking all of the mind mapping you’ve done and ideas you’ve collected and creating your formal course outline to use when you begin creating lessons. I’ve been a huge fan of the Omni line of products for years, including their OmniOutliner app which was where I outlined nearly every project I worked on for two years. But Omni products are, well, expensive. And Workflowy is free.
While it has similar functionality to Evernote, the Workflowy app and UI are very clean. Since this is the case, you aren’t distracted by all of the other lists and notes hanging out staring at you and feeling neglected while you know you should be focusing on your course. And if you are an Evernote user who is a member of team notebooks, you’ll know that FOMO can be pretty intense. Workflowy will keep you focused on your course, allowing you to create comprehensive outlines with bullets and nested notes if needed.

Conclusion
Well, there you have it…our must-have course creation tools in 2017. We hope you can utilize some of these suggestions for creating great training content for your courses.
Do you have any tools that have become indispensable in your course creation process? We’d love to hear about them! Please let us know in the comments below.